
I like eating sandwiches, but I wish they’d make sandwich bread in half loaves because I always feel like we’re racing to eat all of the bread before it goes stale. To remedy this issue, we’ve been making our own sandwich bread. I was intrigued when I ran across this recipe because it’s supposed to stay fresh longer and it looked beautiful!
The first step of this recipe is to make the tangzhong. While it may seem like an odd thing to do this step is important to the recipe and it’s not difficult. In fact, this reminded me of making choux pastry. The biggest tip I have here would just be to make sure you’re constantly whisking so it doesn’t burn. I felt like my tangzhong thickened up pretty quickly so as soon as I noticed the whisk leaving lines on the bottom of the pan I pulled it off.
Honestly from here everything else is simple. Let the tangzhong mixture cool just a bit but then you throw everything into the mixer (if you’re using one) and let the dough hook do it’s work. Once the dough is smooth and elastic then you’ll put it in a greased bowl, cover it, and let it rise.
I always feel like I have issues getting the dough to rise. This particular recipe was no exception and unfortunately I didn’t think about how it might be chilly in the house until the majority of proofing was done. I let the dough proof for about 70 minutes and then checked it and it didn’t look like it had changed much. I turned the stove on for a few minutes so it would warm up, then placed the dough in there and let it rise a little longer. In total the first proof was closer to the 90 minutes.
Then you cut the dough into 4 even sections and fold it (they give instructions on how to do this and it reminded me a little of folding dough for croissants). You’ll put the folded and rolled dough into a pan and let it rise again. I turned the stove on so it would warm up again and put the dough in. I ALMOST forgot to turn the stove off but thankfully remembered after about 5 minutes. It didn’t look like it did any rising for this proof so that was a bit frustrating. Nonetheless I baked it anyway.
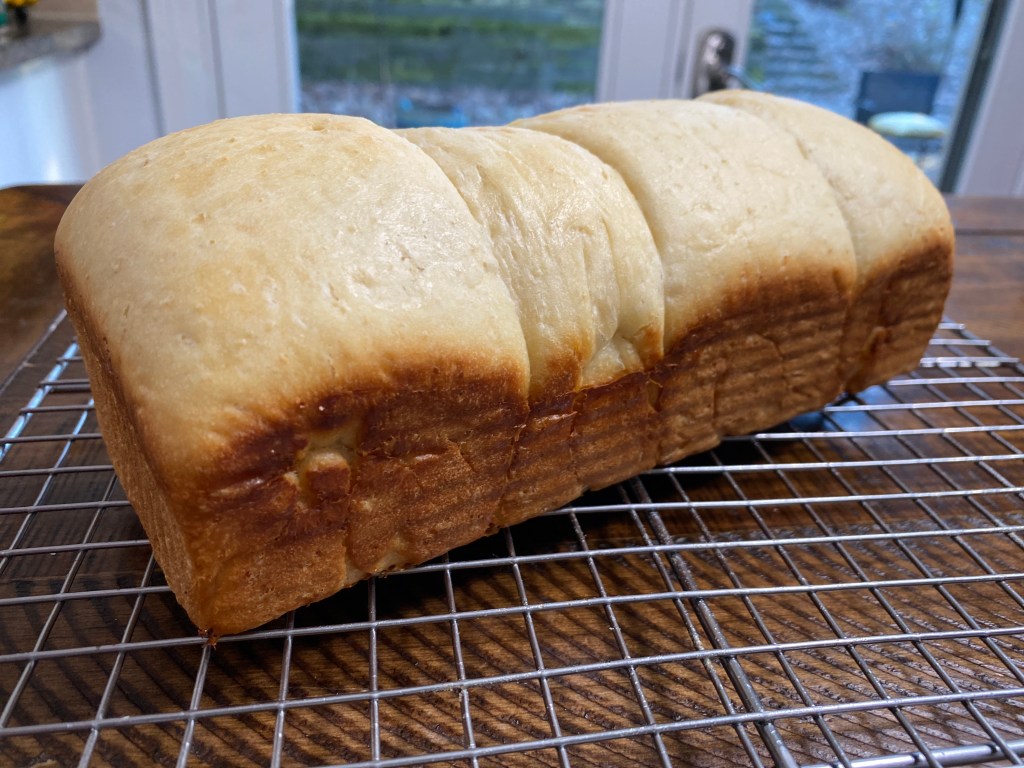
As you can tell in the picture my sections were even so I definitely need to watch that the next time. It was isn’t nearly as tall as the one in the actual recipe and that’s because of the poor proofing. I’m going to try this recipe again and either make sure the kitchen is warmer next time if it’s still cool outside. While it wasn’t as pretty as the actual recipe it tasted very good and I would absolutely make this again!
| Baking Ease | 9 |
| Time Spent | 8 |
| Taste | 10 |
| Visual | 8 |
Recipe Used: King Arthur

One response to “Japanese Milk Bread”
[…] since I made the Japanese Milk Bread I’ve been looking for more sandwich bread recipes. We’ve made a lot of Brian […]
LikeLike