I’ve been a little nervous about this recipe because it’s quite time consuming and there are lots of areas you could mess something up. However, it’s gorgeous and delicious so worth the time and effort.
While you should always read through a recipe before starting this is one that you probably want to read through a few times before you start. Once you’re ready though you’ll begin by making the ganache. I did all of my steps from start to finish and the ganache was nearly perfect by the time I needed it. It’s really easy, you just put your chopped chocolate in a bowl and then heat up the cream until it’s super hot (but not boiling) and then pour the hot cream over the chocolate. You can do this in a saucepan but I heated mine in the microwave. Add in your butter and stir until everything is mixed together.
Next came the part I was most worried about, the Joconde sponge. I haven’t had very good luck with these kind of cakes because I always manage to deflate some of the batter. Nevertheless, you whip your egg whites, then once it’s starting to whip slightly you’ll add a small portion. Then you’ll keep whipping until you get firm peaks, but not super stiff. Basically you want the tip of the whisk to bend slightly if it’s got the egg whites on it. Despite reading the instructions multiple times, I somehow managed to misread to directions and put all of my sugar in the egg white mixture. I consulted my husband who recommended just continuing on since we didn’t want to waste the ingredients. So I kept going and moved my egg whites to another bowl and then mixed the whole eggs and almond flour together. Gently fold this into the meringue mixture until it’s incorporated but you definitely don’t want to mix too much. You’ll take a little of the batter and mix it with the melted butter I failed to mention at the beginning and then you’ll mix that into the larger batter. Finally you’ll add the cake flour and gently mix and then pour into the prepared sheet pan and bake. I let mine go the full 16 minutes because when I checked it at 13 it felt like it needed just a little more time. I was super excited to see that it looked like it was supposed to and didn’t deflate!
While the cake is cooling you’ll make the coffee syrup, another easy one. Just dissolve the espresso powder in a little water, boil the sugar and water until clear, and then mix the two together. Set it aside to cool while you work on the buttercream.
I’ve said this before, but I’m not really a fan of French buttercream. I just feel like it’s a ton of work and depending on the dessert it’s on sometimes it’s too much. However, I wanted to be true to the recipe so I mixed the egg yolks from earlier for 5 minutes until they were pale. While that was mixing I made my syrup, which ended up being a little harder because it’s not a lot of liquid and didn’t quite hit the button of the thermometer so I had to lift it slightly so it would register the temperature every few minutes. I also pulled our the infrared thermometer towards the end just to make sure I didn’t go over 240 F. Once it’s ready you’ll turn down the mixer and slowly pour the syrup onto the sides of the egg mixture trying to avoid the actual whisk but still hit the mixture on the sides. When it’s all mixed you’ll let it continue mixing until the bottom of the bowl is cooled. Then you’ll start adding the butter in little chunks making sure one is incorporated before adding another. This can take a while and even though it was looking fairly good at first it ended up being a little less smooth than I have done before and would have liked. After all the butter is added you’ll add the espresso and vanilla extract.
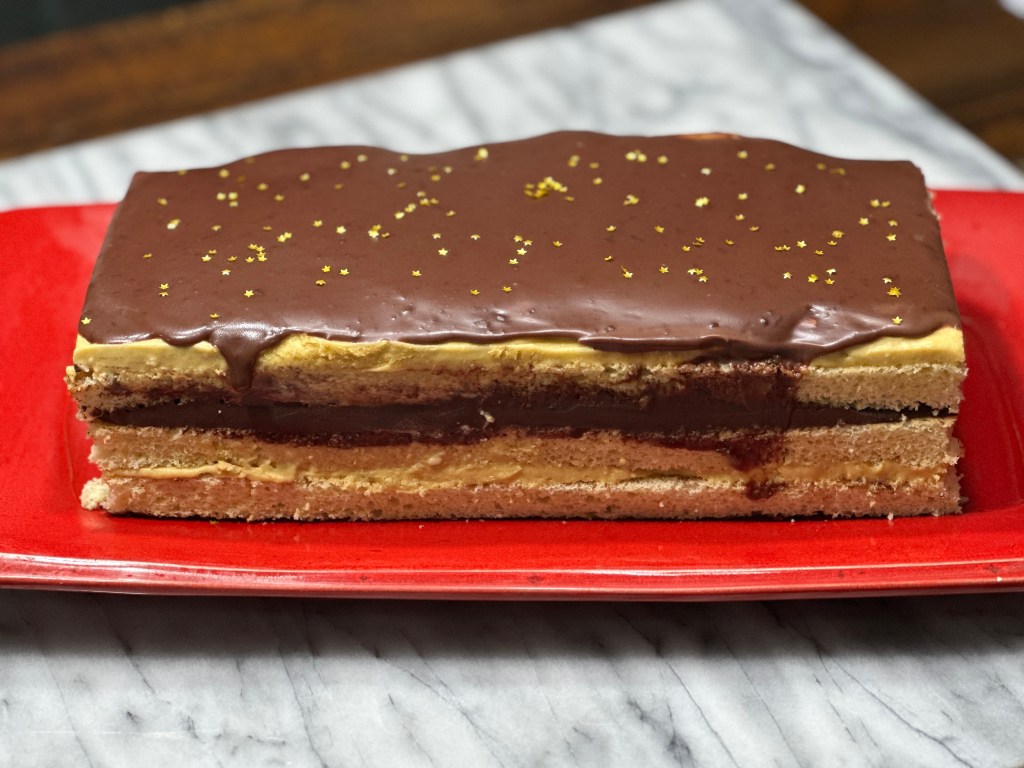
Now that you’ve got everything completed it’s time to assemble. Start by cutting your sponge into 3 sections that are the same size. This is one of those desserts where you want to be exact so take the extra time to measure before cutting. I lucked out and my husband graciously cut my layers for me while I made the chocolate base. You’ll take one of the sponge layers and spread the chocolate base onto it, then pop it into the fridge for at least 10 minutes until the chocolate layer is hardened. Once it’s ready to go you’ll flip this layer over and then using a pastry brush you’ll brush the coffee syrup over the sponge. Add half of the French buttercream and then another layer of sponge. You’ll put your coffee syrup on the sponge again and then add your ganache layer and then the final layer of sponge. Coffee syrup a final time and top with French buttercream then it goes into the fridge again for at least 30 minutes. When it feels firm you can add your chocolate glaze which is just more chocolate with the hot cream pour on top and cooled just slightly. Carefully pour this over the top (I used a spoon) and try to avoid it going over the sides. Pop that back into the fridge so it can firm up before serving.
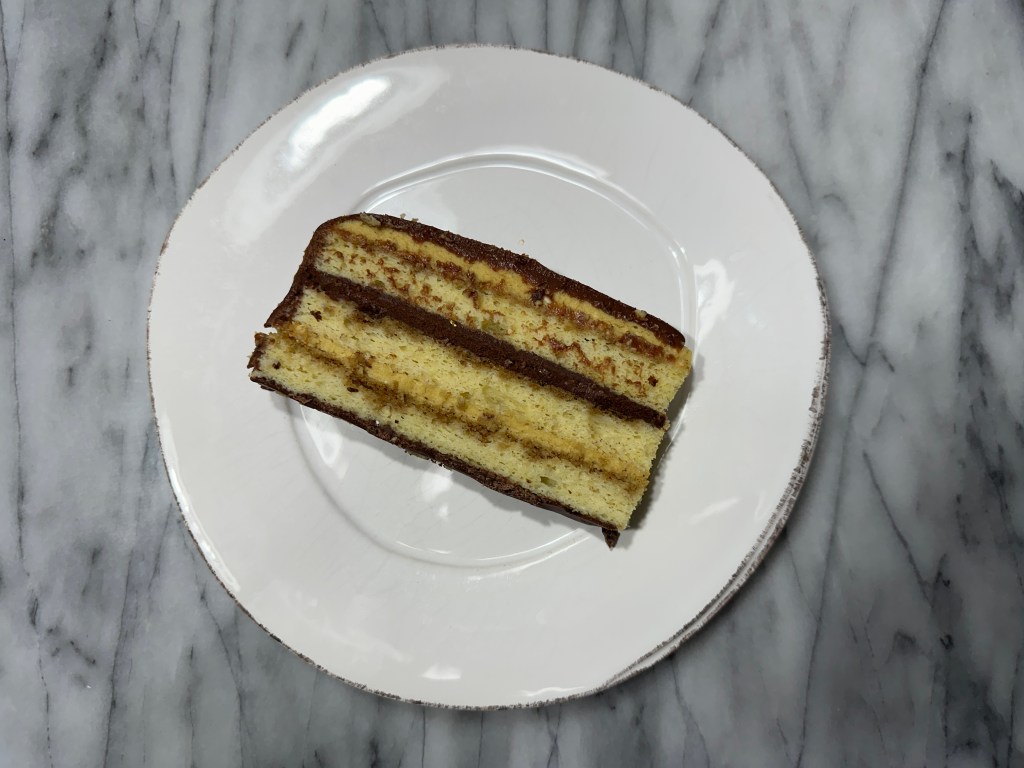
When it was time to serve I topped with some gold leaf stars I found and trimmed the edges. Mine was still a little messier than the recipe photo but I was super pleased at how it turned out! My slices looked really good as well and I had fairly clear cross sections. It bled a little because of the knife, but that’s ok. This tasted amazing, even for someone who doesn’t like French buttercream. It was perfect for this dessert and despite my sponge mishap everything turned out and it truly was quite stunning and delicious! It does take a lot of time and isn’t the easiest of desserts for sure, but certainly worth it and I’m glad to have this off my bake-it bucket list.
| Baking Ease | 8 |
| Time Spent | 8 |
| Taste | 10 |
| Visual | 10 |
Recipe Used: Bonni Bakery
